Make your powershell and terminal beautiful
April 6, 2024 10 mins
This comprehensive guide provides step-by-step instructions to set up an aesthetically pleasing and efficient development environment on Windows. Learn about essential installations and tips to customize your PowerShell and terminal for enhanced productivity.
Table of Content
Introduction
A good looking terminal and shell is a jewellery for programmers. Ricing is a popular term in the world of linux OS. but since we’re in holy grains of windows, we’ll try to do the best to make the terminal and shell look good.
Warning: Note that this is not a guide for windows ricing
Installations
Before we get started, let’s download and install few tools.
Powershell 7 - Install it from microsoft store itself.
Wezterm - Wezterm is a gpu accelerated terminal emulator written in
Rust. You can either install it by following official installation guide or you can install it using scoop. I have already explained the process of installing scoop and wezterm in my post.
# run following commands in powershell or cmd
scoop bucket add extras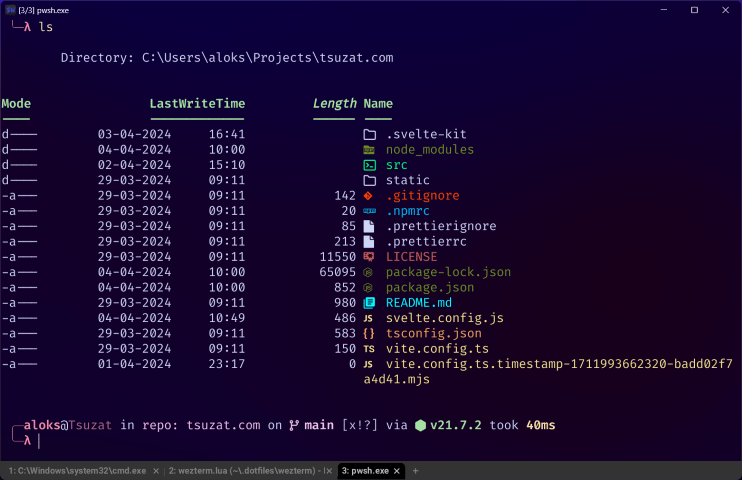
scoop install wezterm- Starship - Starship is a shell prompt. It’ll help us display many useful information in shell(see image below)
 Preview of starship, I personally configured
To install starship, you need to run following command.
scoop install starship- Nerd Fonts- Download and install nerd font. I’ll be using
FiraCode Nerd Fontas my default font across the platform.
Set up
Once the installation is completed, Let’s set up everything one by one.
Setting up Wezterm
Wezterm provides the explained configuration in their docs.
But, you’re here for a simple and straightforward explaination. Don’t worry; I got you. To configure wezterm,
you need to make a file in location $HOME/.config/wezterm/wezterm.lua. Windows do have .config folder in $HOME so you just need to make a wezterm folder in $HOME/.config. The structure should look like this
$HOME
  └──.config
        └──wezterm
            ├── colors
            │     ├── catppuccin-mocha.toml
            │     └── NeoSolarized-dark.toml
            └── wezterm.lua
Info: The colors folder will hold the colorschemes for the wezterm
Click here to reveal catppuccin-mocha.toml
Put the following code in catppuccin-mocha.toml
[colors]
ansi = [
  '#45475a',
  '#f38ba8',
  '#a6e3a1',
  '#f9e2af',
  '#89b4fa',
  '#f5c2e7',
  '#94e2d5',
  '#bac2de',
]
background = '#1e1e2e'
brights = [
  '#585b70',
  '#f38ba8',
  '#a6e3a1',
  '#f9e2af',
  '#89b4fa',
  '#f5c2e7',
  '#94e2d5',
  '#a6adc8',
]
compose_cursor = '#f2cdcd'
cursor_bg = '#f5e0dc'
cursor_border = '#f5e0dc'
cursor_fg = '#11111b'
foreground = '#cdd6f4'
scrollbar_thumb = '#585b70'
selection_bg = '#585b70'
selection_fg = '#cdd6f4'
split = '#6c7086'
visual_bell = '#313244'

[colors.indexed]
16 = '#fab387'
17 = '#f5e0dc'

[colors.tab_bar]
background = '#11111b'
inactive_tab_edge = '#313244'

[colors.tab_bar.active_tab]
bg_color = '#cba6f7'
fg_color = '#11111b'
intensity = 'Normal'
italic = false
strikethrough = false
underline = 'None'

[colors.tab_bar.inactive_tab]
bg_color = '#181825'
fg_color = '#cdd6f4'
intensity = 'Normal'
italic = false
strikethrough = false
underline = 'None'

[colors.tab_bar.inactive_tab_hover]
bg_color = '#1e1e2e'
fg_color = '#cdd6f4'
intensity = 'Normal'
italic = false
strikethrough = false
underline = 'None'

[colors.tab_bar.new_tab]
bg_color = '#313244'
fg_color = '#cdd6f4'
intensity = 'Normal'
italic = false
strikethrough = false
underline = 'None'

[colors.tab_bar.new_tab_hover]
bg_color = '#45475a'
fg_color = '#cdd6f4'
intensity = 'Normal'
italic = false
strikethrough = false
underline = 'None'

[metadata]
aliases = []
author = 'Catppuccin Org'
name = 'Catppuccin Mocha'
Click here to reveal NeoSolarized-dark.toml
Put the following code in NeoSolarized-dark.toml
# NeoSolarized Dark

[colors]
background = "#001217"
foreground = "#708183"

cursor_bg = "#708183"

selection_bg = "#fcf4dc"
selection_fg = "#001e26"

[colors.tab_bar]
background = "#073642"

[colors.tab_bar.active_tab]
fg_color = "#181926"
bg_color = "#268bd2"

[colors.tab_bar.inactive_tab]
fg_color = "#CAD3F5"
bg_color = "#586e75"

ansi = [ "#002b36", "#dc322f", "#859900", "#b58900", "#268bd2", "#d33682", "#2aa198", "#e9e2cb" ]
brights = [ "#001e26", "#cb4b16", "#465a61", "#52676f", "#708183", "#6c71c4", "#81908f", "#fcf4dc" ]

[metadata]
author = 'Tsuzat'
name = 'NeoSolarized Dark'
Now, let’s set up wezterm.lua. I have gone with following configurations.
You can copy this code but I’d recommend to understand it first.
local wezterm = require "wezterm"

return {
  default_prog = {'pwsh.exe' }, -- Powershell
  font = wezterm.font 'FiraCode Nerd Font', -- Nerd Font which fallbacks to JetBrains Mono
  font_size = 14,
  hide_tab_bar_if_only_one_tab = true,
  tab_bar_at_bottom = true,
  window_background_opacity = 0,
  -- Available "Acrylic", "Mica", "Tabbed", "Disable" and "Auto"
  win32_system_backdrop = "Tabbed",
  initial_rows = 30,
  initial_cols = 100,
  color_scheme = 'NeoSolarized Dark',
  color_scheme_dirs = { "~/.config/wezterm/colors" },
  window_padding = {
    left = 2,
    right = 2,
    top = 0,
    bottom = 0,
  },
  default_cursor_style = 'SteadyBar',
}
Setting up starship
For the configuration of starship, we can refer to official docs.
But, I’m here to make the initial configuration simple. The extension of that can be limitless.
By default, all the configuration for starship lies in file $HOME/.config/starship.toml
$HOME
  └──.config
        └──starship.toml
Inside this file, you can put following code.
Click here to reveal code for starship.toml
Put this code in starship.toml
## FIRST LINE/ROW: Info & Status
# First param ─┌
[username]
format = " [╭─$user]($style)@"
show_always = true
style_root = "bold red"
style_user = "bold red"
# Second param
[hostname]
disabled = false
format = "[$hostname]($style) in "
ssh_only = false
style = "bold dimmed red"
trim_at = "-"
# Third param
[directory]
style = "purple"
truncate_to_repo = true
truncation_length = 0
truncation_symbol = "repo: "
# Fourth param
[sudo]
disabled = false
# Before all the version info (python, nodejs, php, etc.)
[git_status]
ahead = "⇡${count}"
behind = "⇣${count}"
deleted = "x"
diverged = "⇕⇡${ahead_count}⇣${behind_count}"
style = "white"
# Last param in the first line/row
[cmd_duration]
disabled = false
format = "took [$duration]($style)"
min_time = 1
## SECOND LINE/ROW: Prompt
# Somethere at the beginning
[battery]
charging_symbol = ""
disabled = true
discharging_symbol = ""
full_symbol = ""
[[battery.display]] # "bold red" style when capacity is between 0% and 10%
disabled = false
style = "bold red"
threshold = 15
[[battery.display]] # "bold yellow" style when capacity is between 10% and 30%
disabled = true
style = "bold yellow"
threshold = 50
[[battery.display]] # "bold green" style when capacity is between 10% and 30%
disabled = true
style = "bold green"
threshold = 80
# Prompt: optional param 1
[time]
disabled = true
format = " 🕙 $time($style)\n"
style = "bright-white"
time_format = "%T"
# Prompt: param 2
[character]
error_symbol = " [×](bold red)"
success_symbol = " [╰─λ](bold red)"
# SYMBOLS
[status]
disabled = false
format = '[[$symbol$status_common_meaning$status_signal_name$status_maybe_int]]($style)'
map_symbol = true
pipestatus = true
symbol = "🔴"
[aws]
symbol = " "
[conda]
symbol = " "
[dart]
symbol = " "
[kotlin]
symbol = " "
[docker_context]
symbol = " "
[elixir]
symbol = " "
[elm]
symbol = " "
[git_branch]
symbol = " "
[golang]
symbol = " "
[hg_branch]
symbol = " "
[java]
symbol = " "
[julia]
symbol = " "
[nim]
symbol = " "
[nix_shell]
symbol = " "
[nodejs]
symbol = " "
[package]
symbol = " "
[perl]
symbol = " "
[php]
symbol = " "
[python]
symbol = " "
[ruby]
symbol = " "
[rust]
symbol = " "
[swift]
symbol = " "Setting up Powershell
The location of powershell configuration file may vary depend upon your system.
This is why I’ll recommend you to make a smart decision. We’ll make a file user_profile.ps1 and make the default powershell configuration file refer to user_profile.ps1.
I’ll create it in a $HOME/.dotfiles/powershell/user_profile.ps1 folder but you can create it anywhere,
as long as you can find and edit it.
Once the file is created, I’ll open default configuration file of powershell by using following commands.
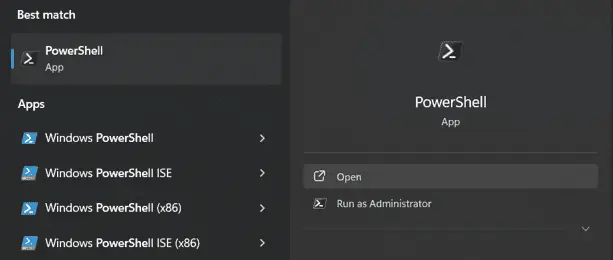 powershell 7 recommended to run all commands
Warning: Run this command using powershell 7 only, to avoid conflicts.
notepad $PROFILEInside the Nodepad, you need to add following line, . $env:USERPROFILE\.dotfiles\powershell\user_profile.ps1 (see image)
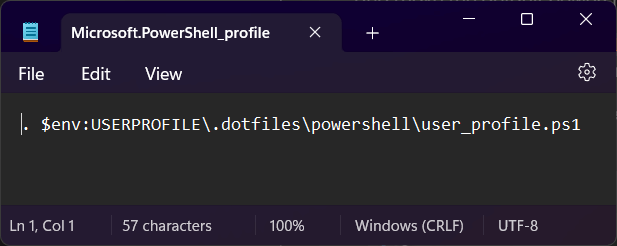 put the code in file and save using Ctrl + S
Now, we’re ready to edit user_profile.ps1 as per our need. Before, goind to the
editing the user_profile.ps1 itself. Let’s install few packages.
# terminal icons provides the icons in terminal itself.
# gsudo let us run Elevated commands like `sudo` in linux
# scoop-completion provides auto complete in scoop commands on pressing <TAB>
scoop install terminal-icons gsudo scoop-completion

# Provides the history of commands
Install-Module -Name PSReadLine
Once, everything is installed, let’s put the following code in user_profile.ps1.
Try to understand each line of code.
# icons for powershell terminal
# scoop install terminal-icons
Import-Module Terminal-Icons

# For Elevated Command
# scoop install gsudo
Import-Module gsudoModule

# history of the commands
# Install-Module -Name PSReadLine
Import-Module PSReadLine

Set-PSReadLineOption -PredictionSource History
Set-PSReadLineOption -PredictionViewStyle ListView

# Vim Like KeyBinding for Next and Previous History Selection
# Using `Ctrl+j` for Next selection and `Ctrl+k` for Previous selection
# Remove following commands if you want to use just arrow key for navigation
Set-PSReadLineKeyHandler -Key Ctrl+j -Function HistorySearchForward
Set-PSReadLineKeyHandler -Key Ctrl+k -Function HistorySearchBackward

# Alias
Set-Alias -Name "vim" -Value "nvim"
Set-Alias -Name "v" -Value "nvim"
Set-Alias -Name "g" -Value "git"
Set-Alias -Name ".." -Value "cd.."
Set-Alias -Name "lg" -Value "lazygit"

# Useful functions
function cd...  { Set-Location .... }
function cd.... { Set-Location ...... }
function ll { Get-ChildItem -Path $pwd -File }

# Reload this config file
function reload-profile {
  & $profile
}

# very powerful function to kill processes by process name
function pkill($name) {
  Get-Process $name -ErrorAction SilentlyContinue | Stop-Process
}

# function to grep the process by name
function pgrep($name) {
  Get-Process $name
}

####### Utilities #######

# function to create a new git repo
function giac($Branch = "master", $Message = "Initial Commit") {
    git init -b $Branch
    git add .
    git commit -am $Message
}
# function for quick git add, commit and push
# by just providing the Message
function gacp ($Message){
  git add .
  git commit -am $Message
  git push -u
}

# function to emulate linux `which` command
# this outputs the application path
function which ($Command) {
  Get-Command -Name $Command -ErrorAction SilentlyContinue |
    Select-Object -ExpandProperty Path -ErrorAction SilentlyContinue
}

# Function to delete Item(s) and Directory(ies)
function delete ($Item){
  Remove-Item -Recurse -Force $Item
}

# Function to emulate
function time ($Command){
  $executionTime = Measure-Command { Invoke-Expression -Command $command }
  Write-Host "Execution Time: $($executionTime.TotalMilliseconds) milliseconds"
}

# install scoop-completion
#`scoop install scoop-completion`
# enable completion in current shell, use absolute path because PowerShell Core not respect $env:PSModulePath
Import-Module "$($(Get-Item $(Get-Command scoop.ps1).Path).Directory.Parent.FullName)modulesscoop-completion"

cls # clear any output after loading the config

# install starship
# `scoop install starship`
Invoke-Expression (&starship init powershell)
All Done. Now you can open wezterm. Install neofetch using following command,
scoop install neofetchthen run the command,
neofetch.exeYou will see something like this.
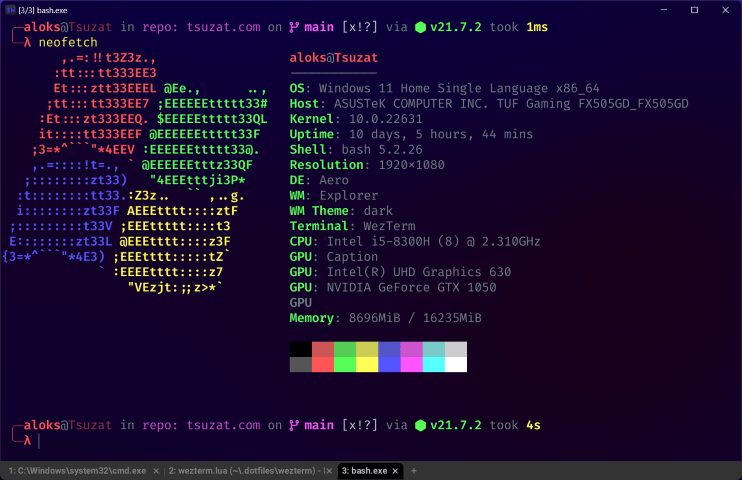 Preview after running neofetch
Click here to see other previews
| catppuccin-mocha | NeoSolarized-dark |
|---|---|
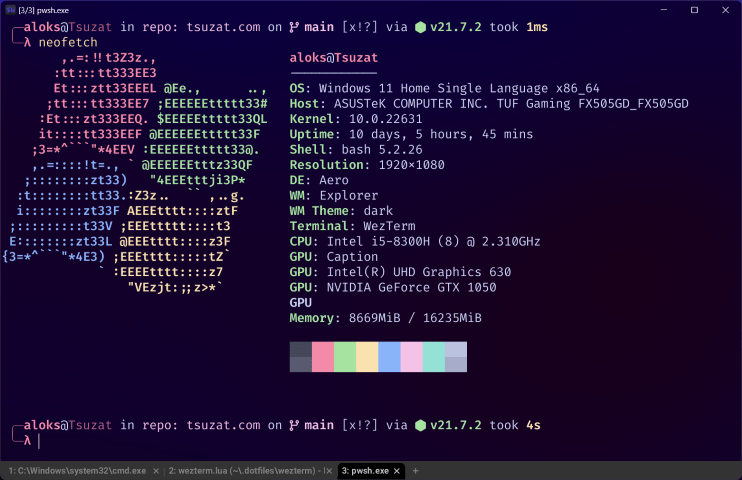 | |
 |  |
Conclusion
Configuring PowerShell and terminals on Windows can significantly enhance your development experience. By following this guide, you can create a personalized and efficient workspace tailored to your needs. Enjoy coding in a visually pleasing and productive environment!
Bonus
Here’s a collection of amazing wallpapers.